I spray painted an xbox controller!
My partner wanted bunny themed gifts for their birthday, and they also wanted an xbox controller. Soo I decided to combine the two and surprise them with a bunny themed xbox controller. I looked into custom printed xbox controller faceplate's, but such a thing doesn't really exist. I found one person online who would hydro dip a custom printed sheet for you on an xbox faceplate, but they had a really long turnaround time so that was off the table. I decided that I would just spray paint my own (despite having no experience).
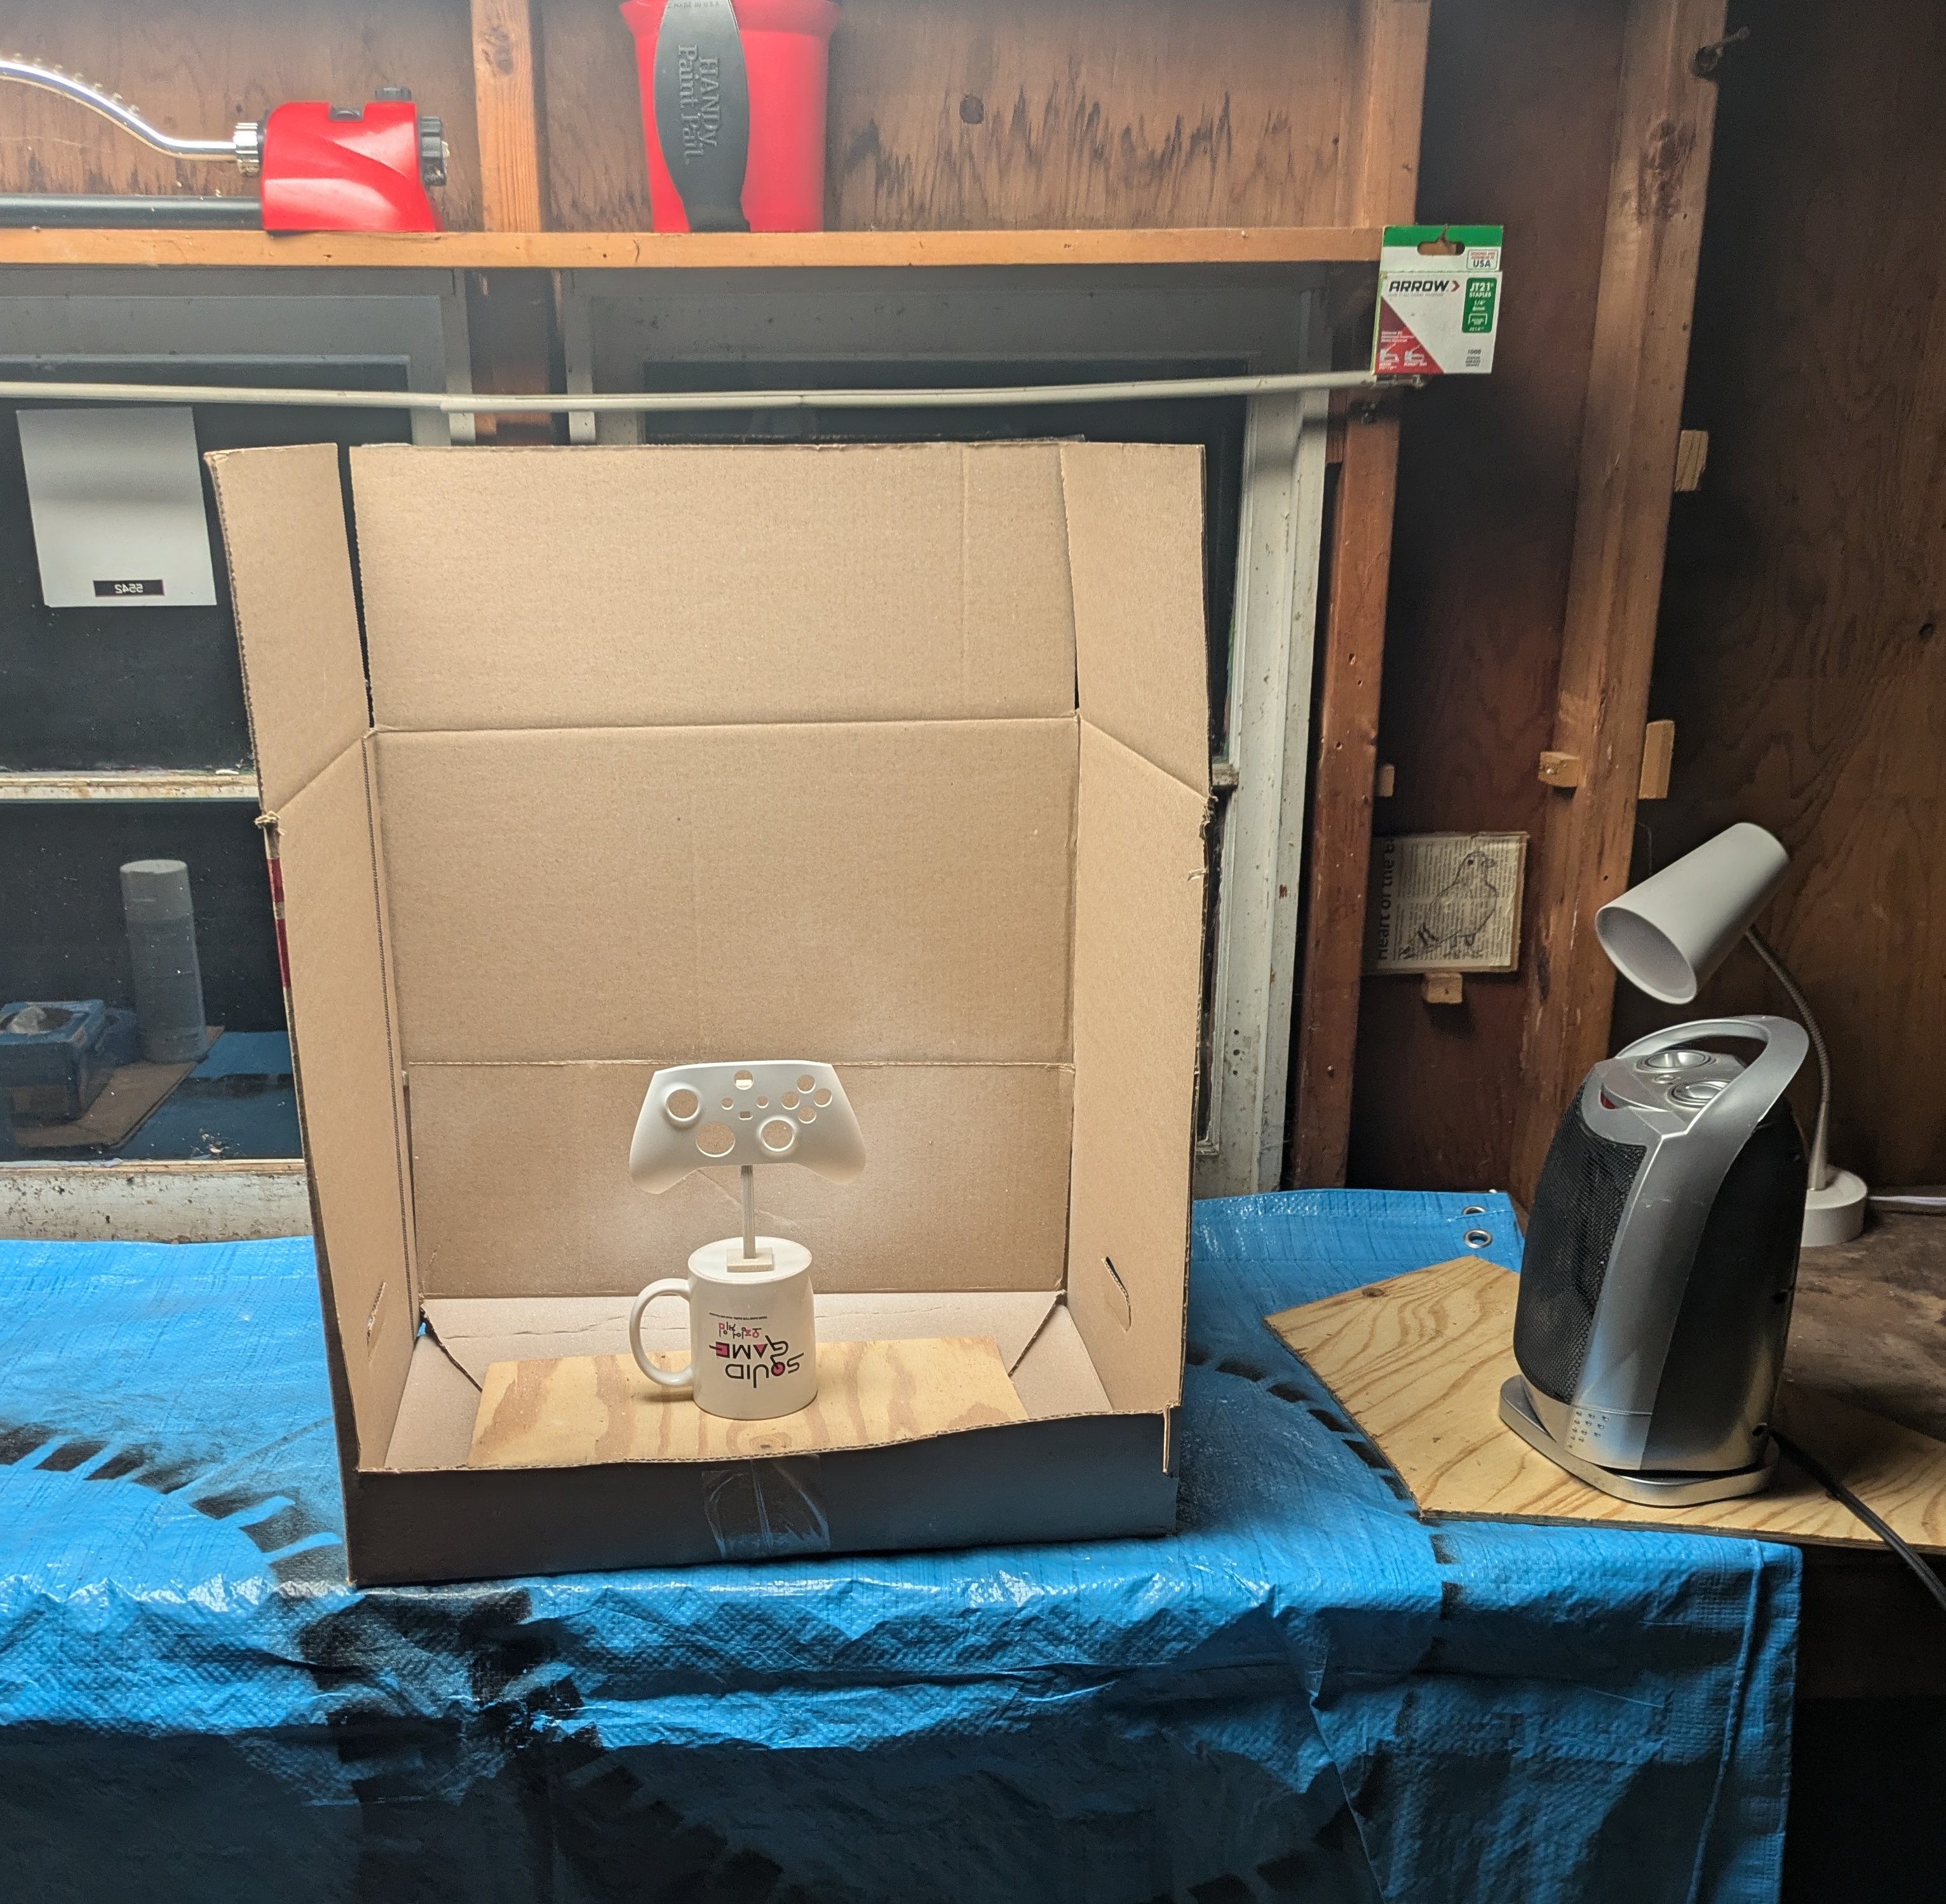
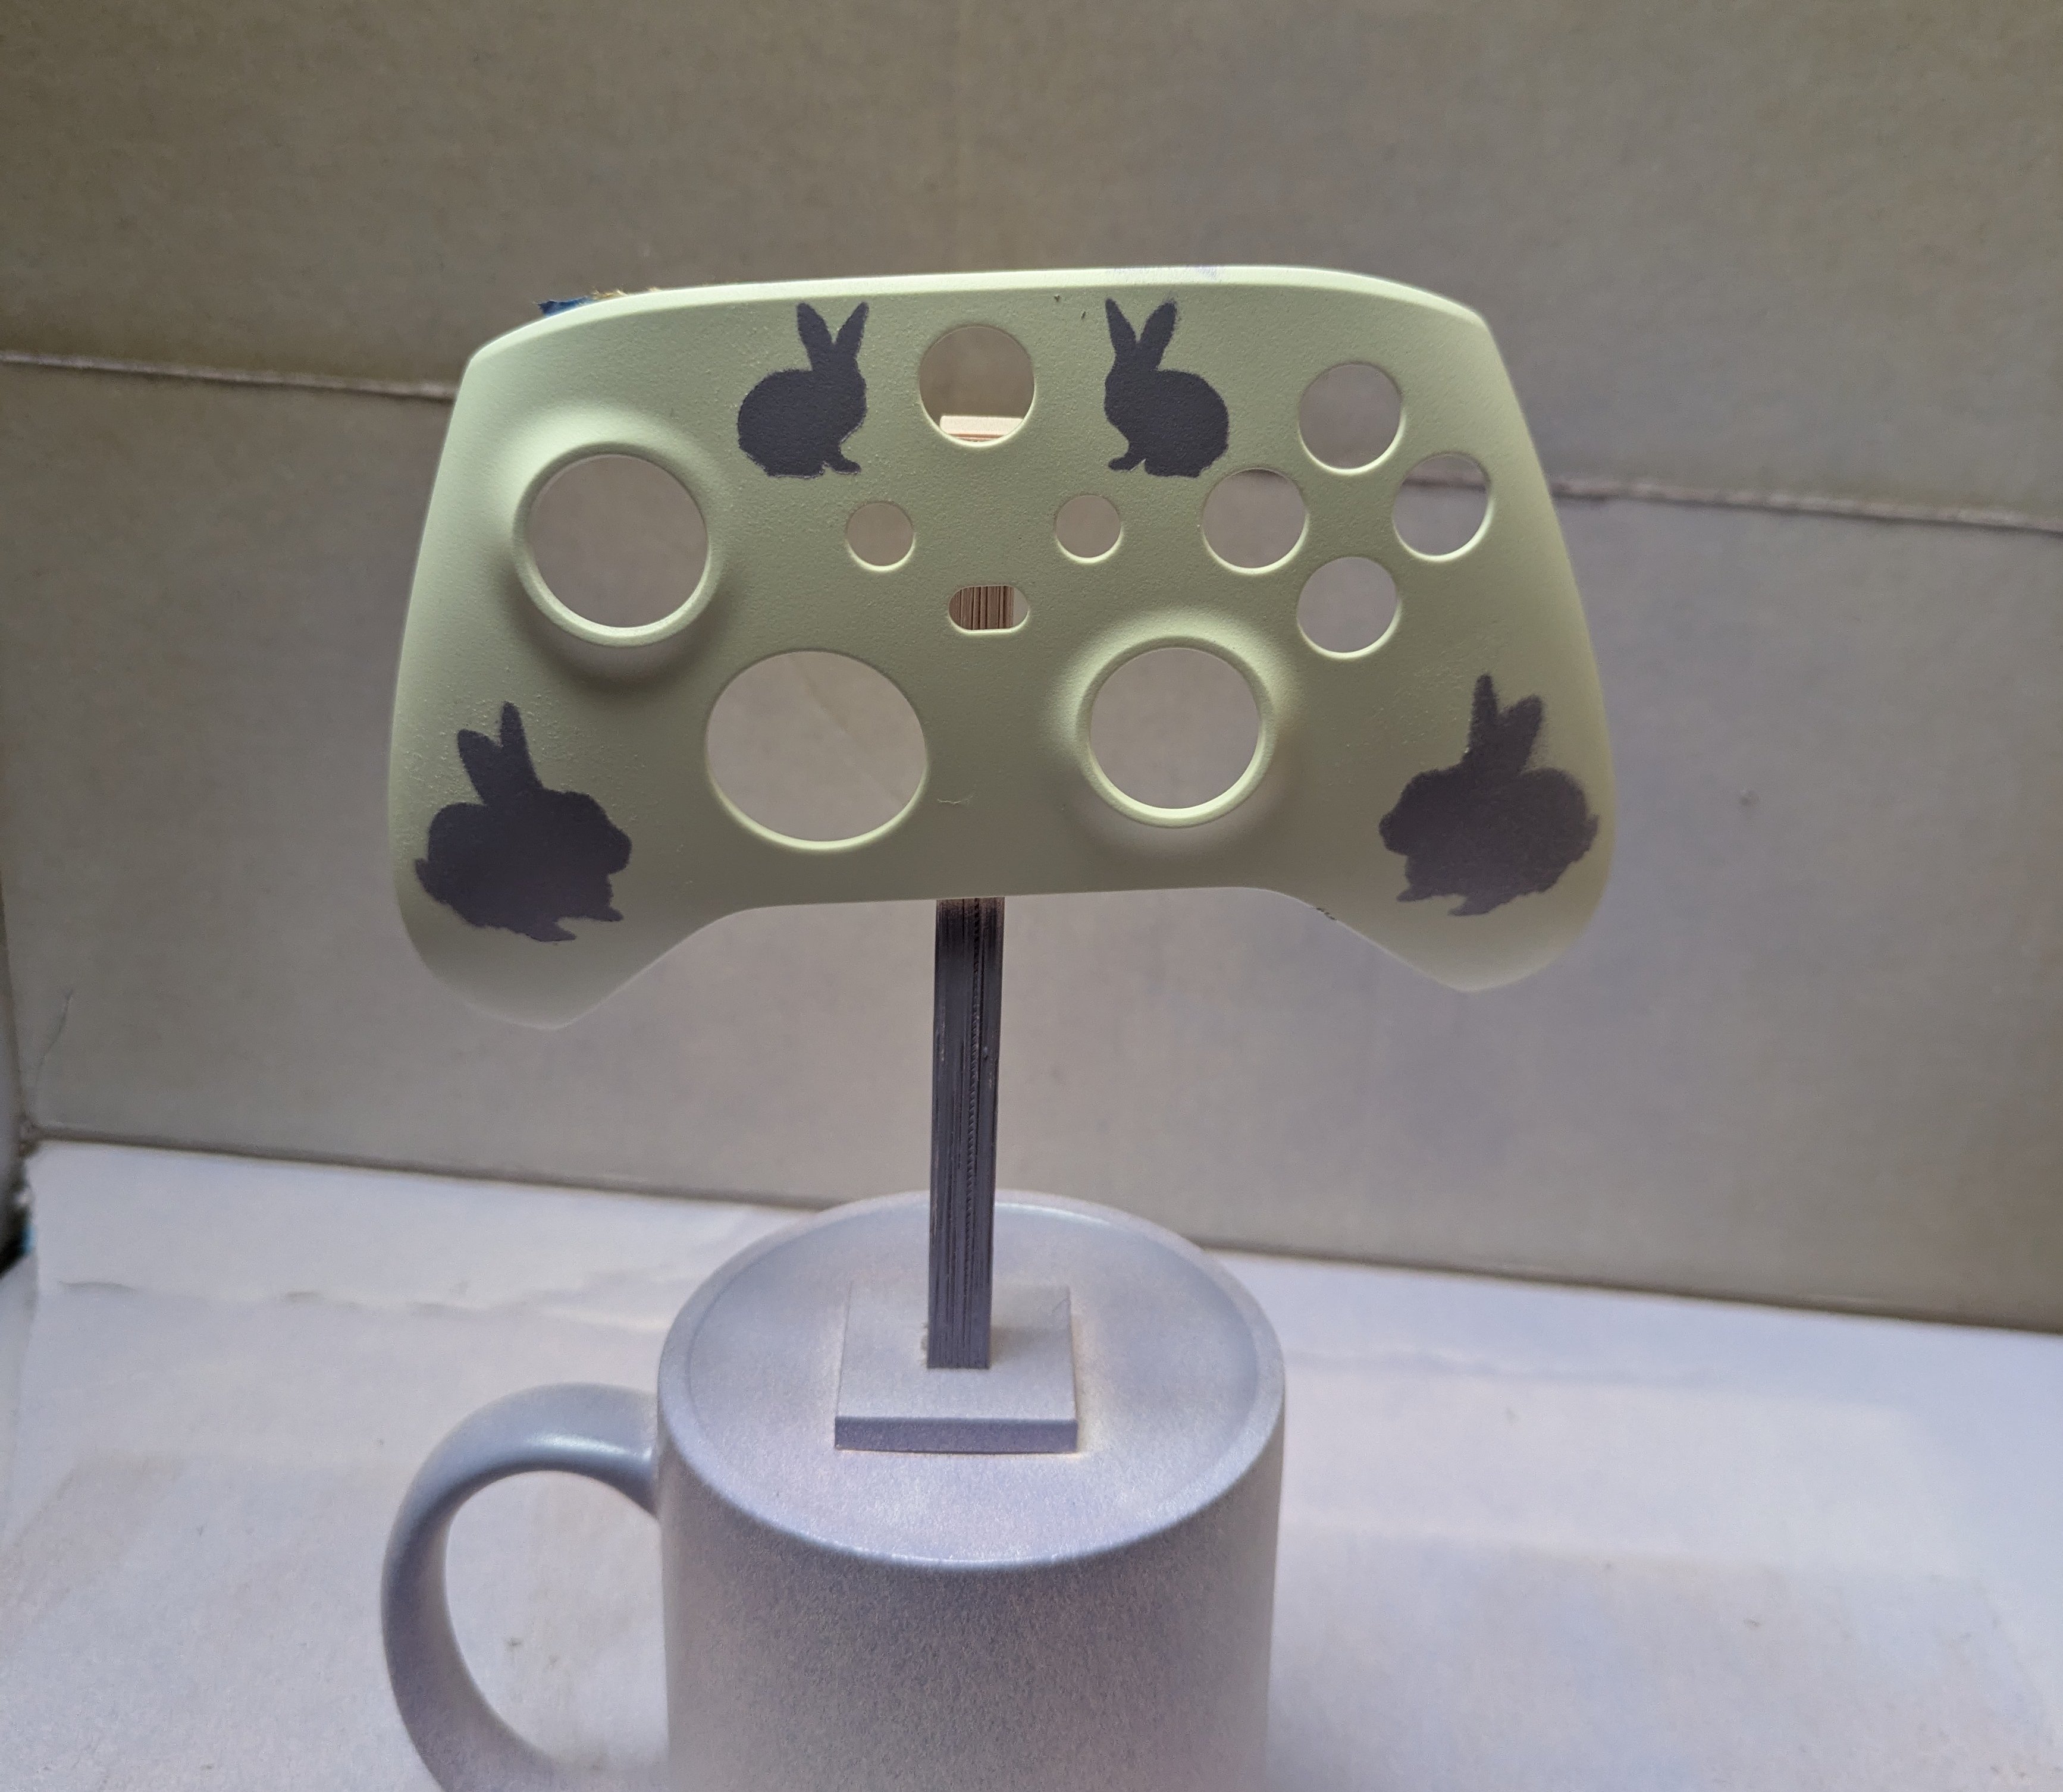
My setup
Because I live in an apartment, I don't really have anywhere good to spray paint something. Thankfully my mom agreed to give me some help and let me use her garage for the painting. (She also had no experience with spray painting)
I 3d printed an arm to hold up the controller, and my mother had the idea to cut the face out of a box to catch the over spray. We put the whole thing on an old mug to elevate the controller a little bit. It was only around 40 degrees out, so we also used a space heater to help with the drying process.
How I did it
I started with a couple layers of primer in order to help ensure the next layers of paint stick well. The advice I heard is to not rely on paint + primer two in one paint because it just won't hold as well as a separate primer will. Especially if you're painting on an object that is going to be subjected to being touched a lot.
Then, it was time for my base color. I choose a light pink. Word of warning to anyone who uses a light colored spray paint, it won't look like the surface is being covered at all at first. It will take a few layers for you to see an even coat. On my first coat of the light pink, I didn't see any paint going down at all. So I moved my can a bit closer... and totally soaked the front surface. I quickly padded off the dripping with a paper towel & it took a lot of extra layers to make it look even again.
After I got that disaster cleaned up, I attached my stencils. I made stencils using my Silhouette Portrait 3. At first, I tried cutting them on a weak vinyl. It was too strong though and ended up pulling off my pink coat (and I had to redo my primer + pink layers again!).
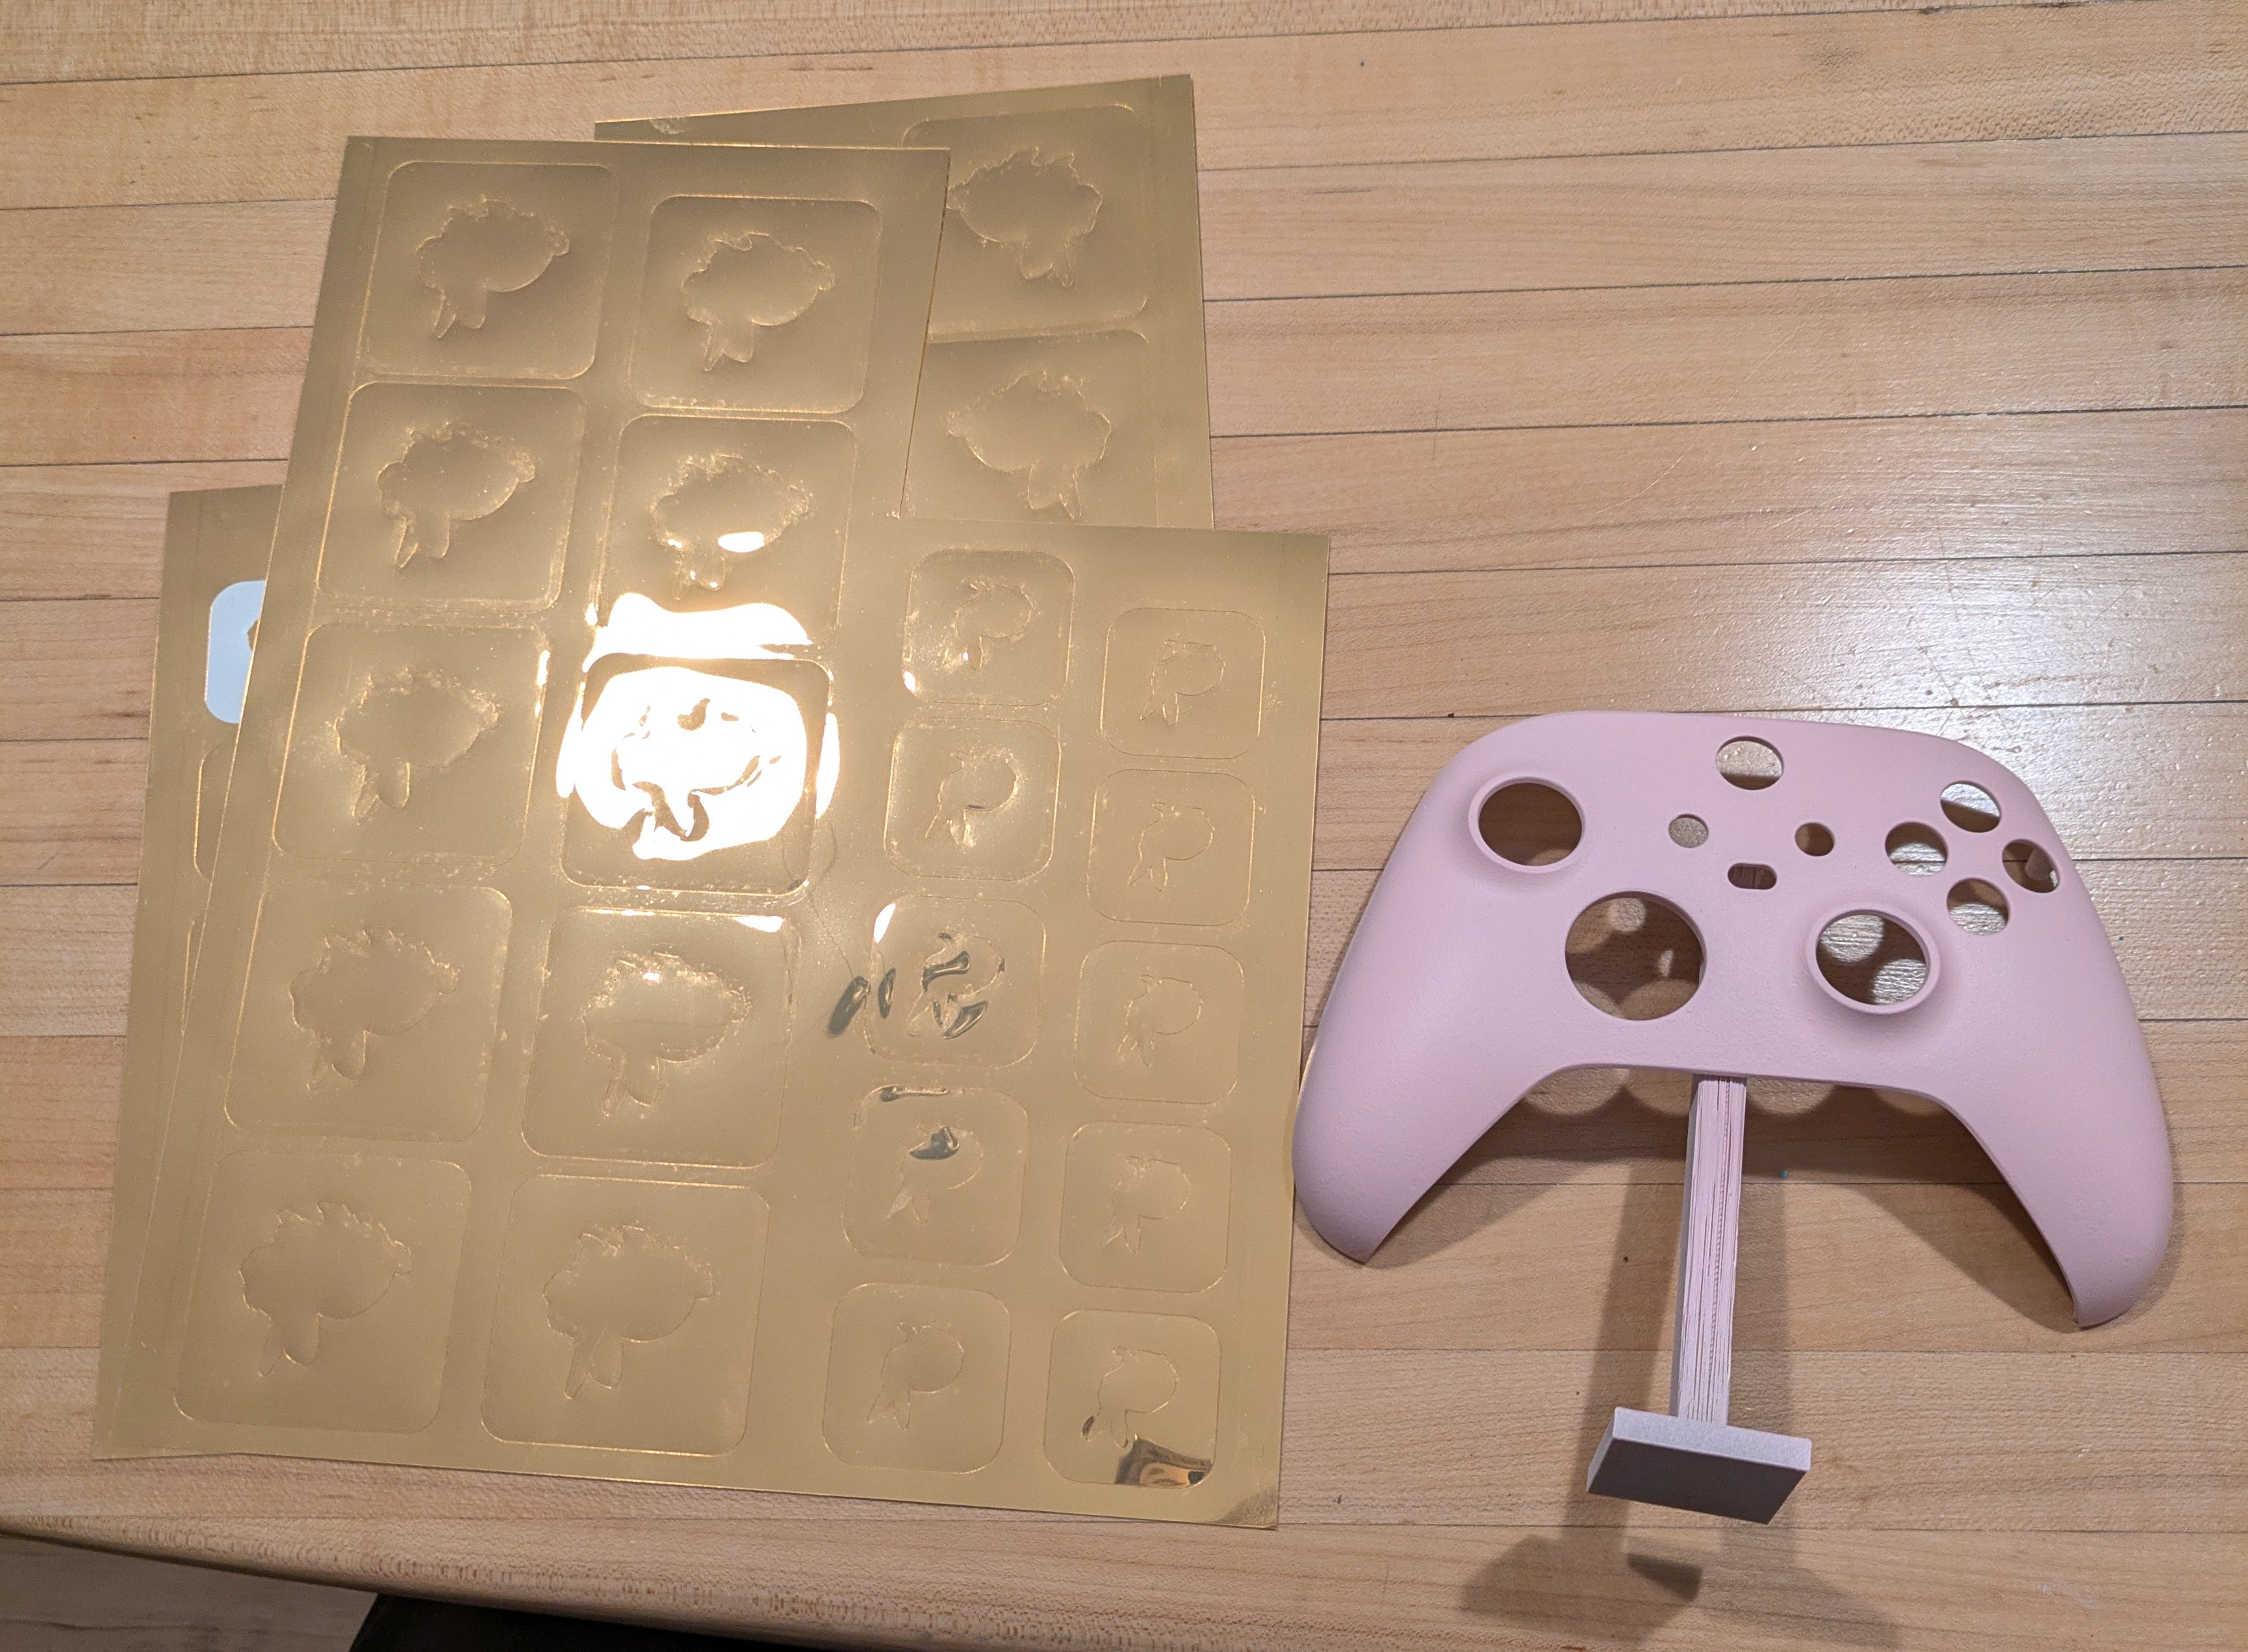
Sheet of cut vinyl stencils, pre-disaster
I ended up buying a thin clear sheet to use as a stencil instead, which I attached using a light tack spray adhesive.
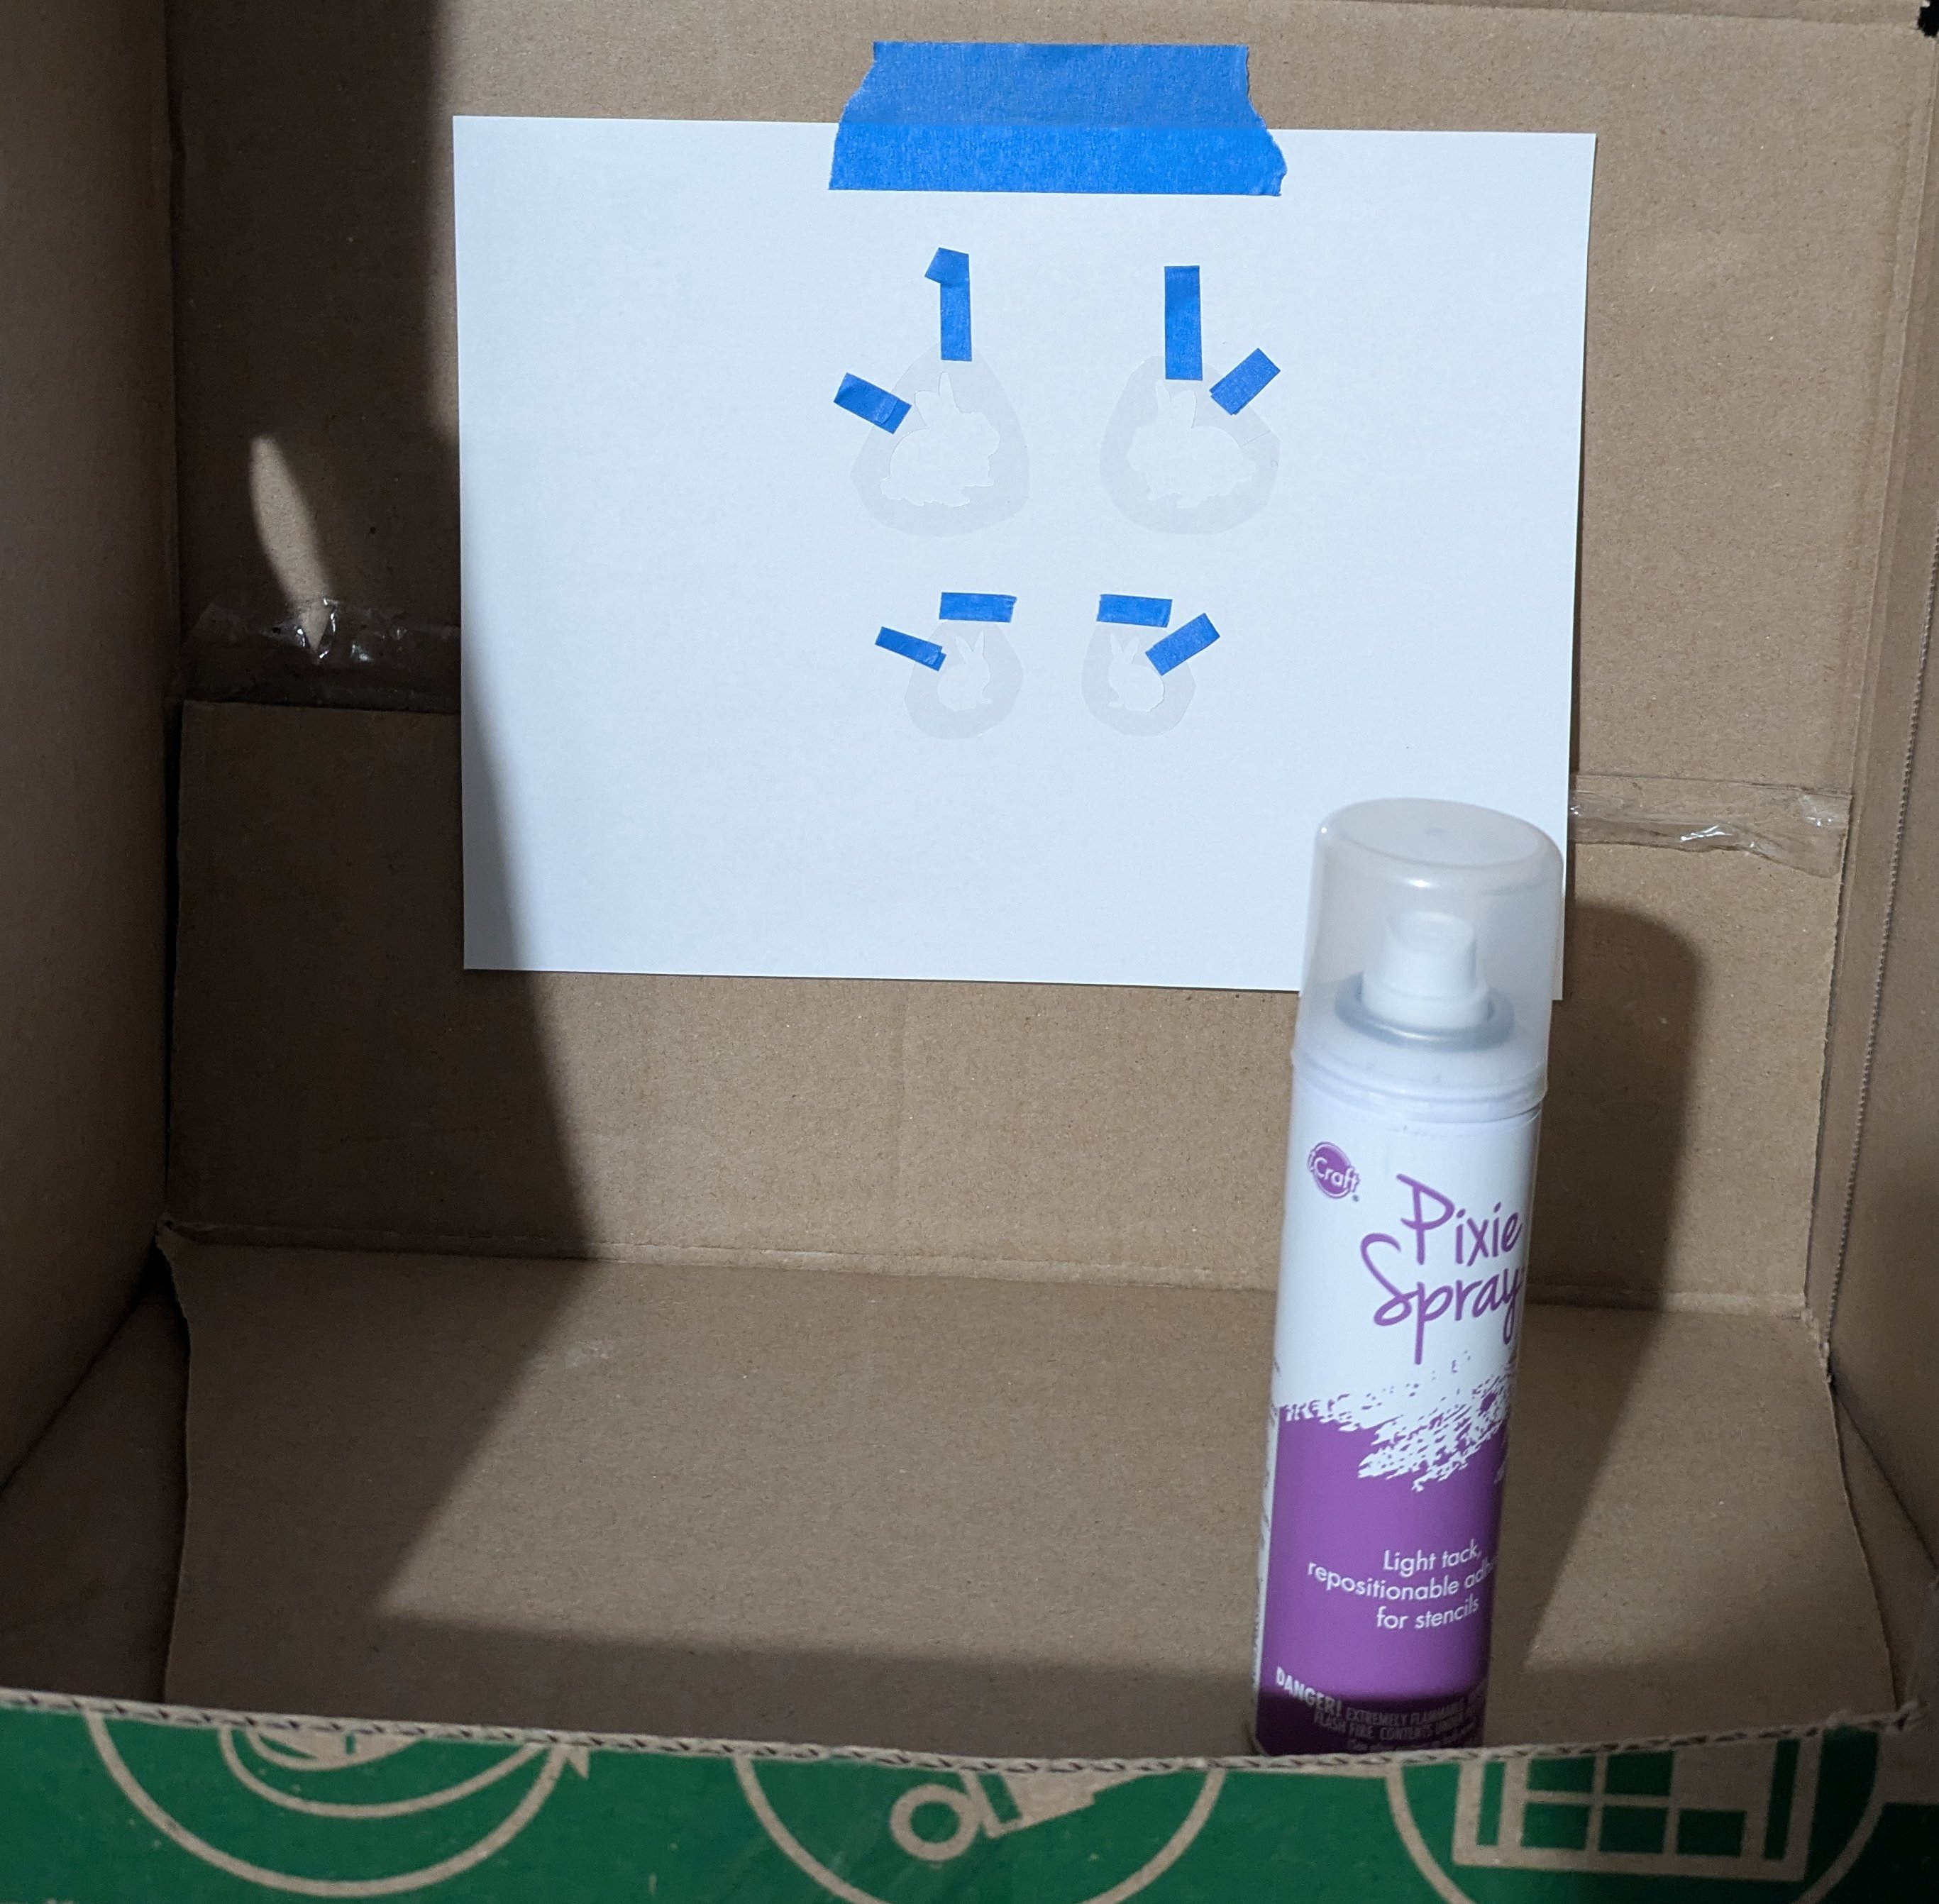
The stencils, sprayed and ready to be attached to the controller
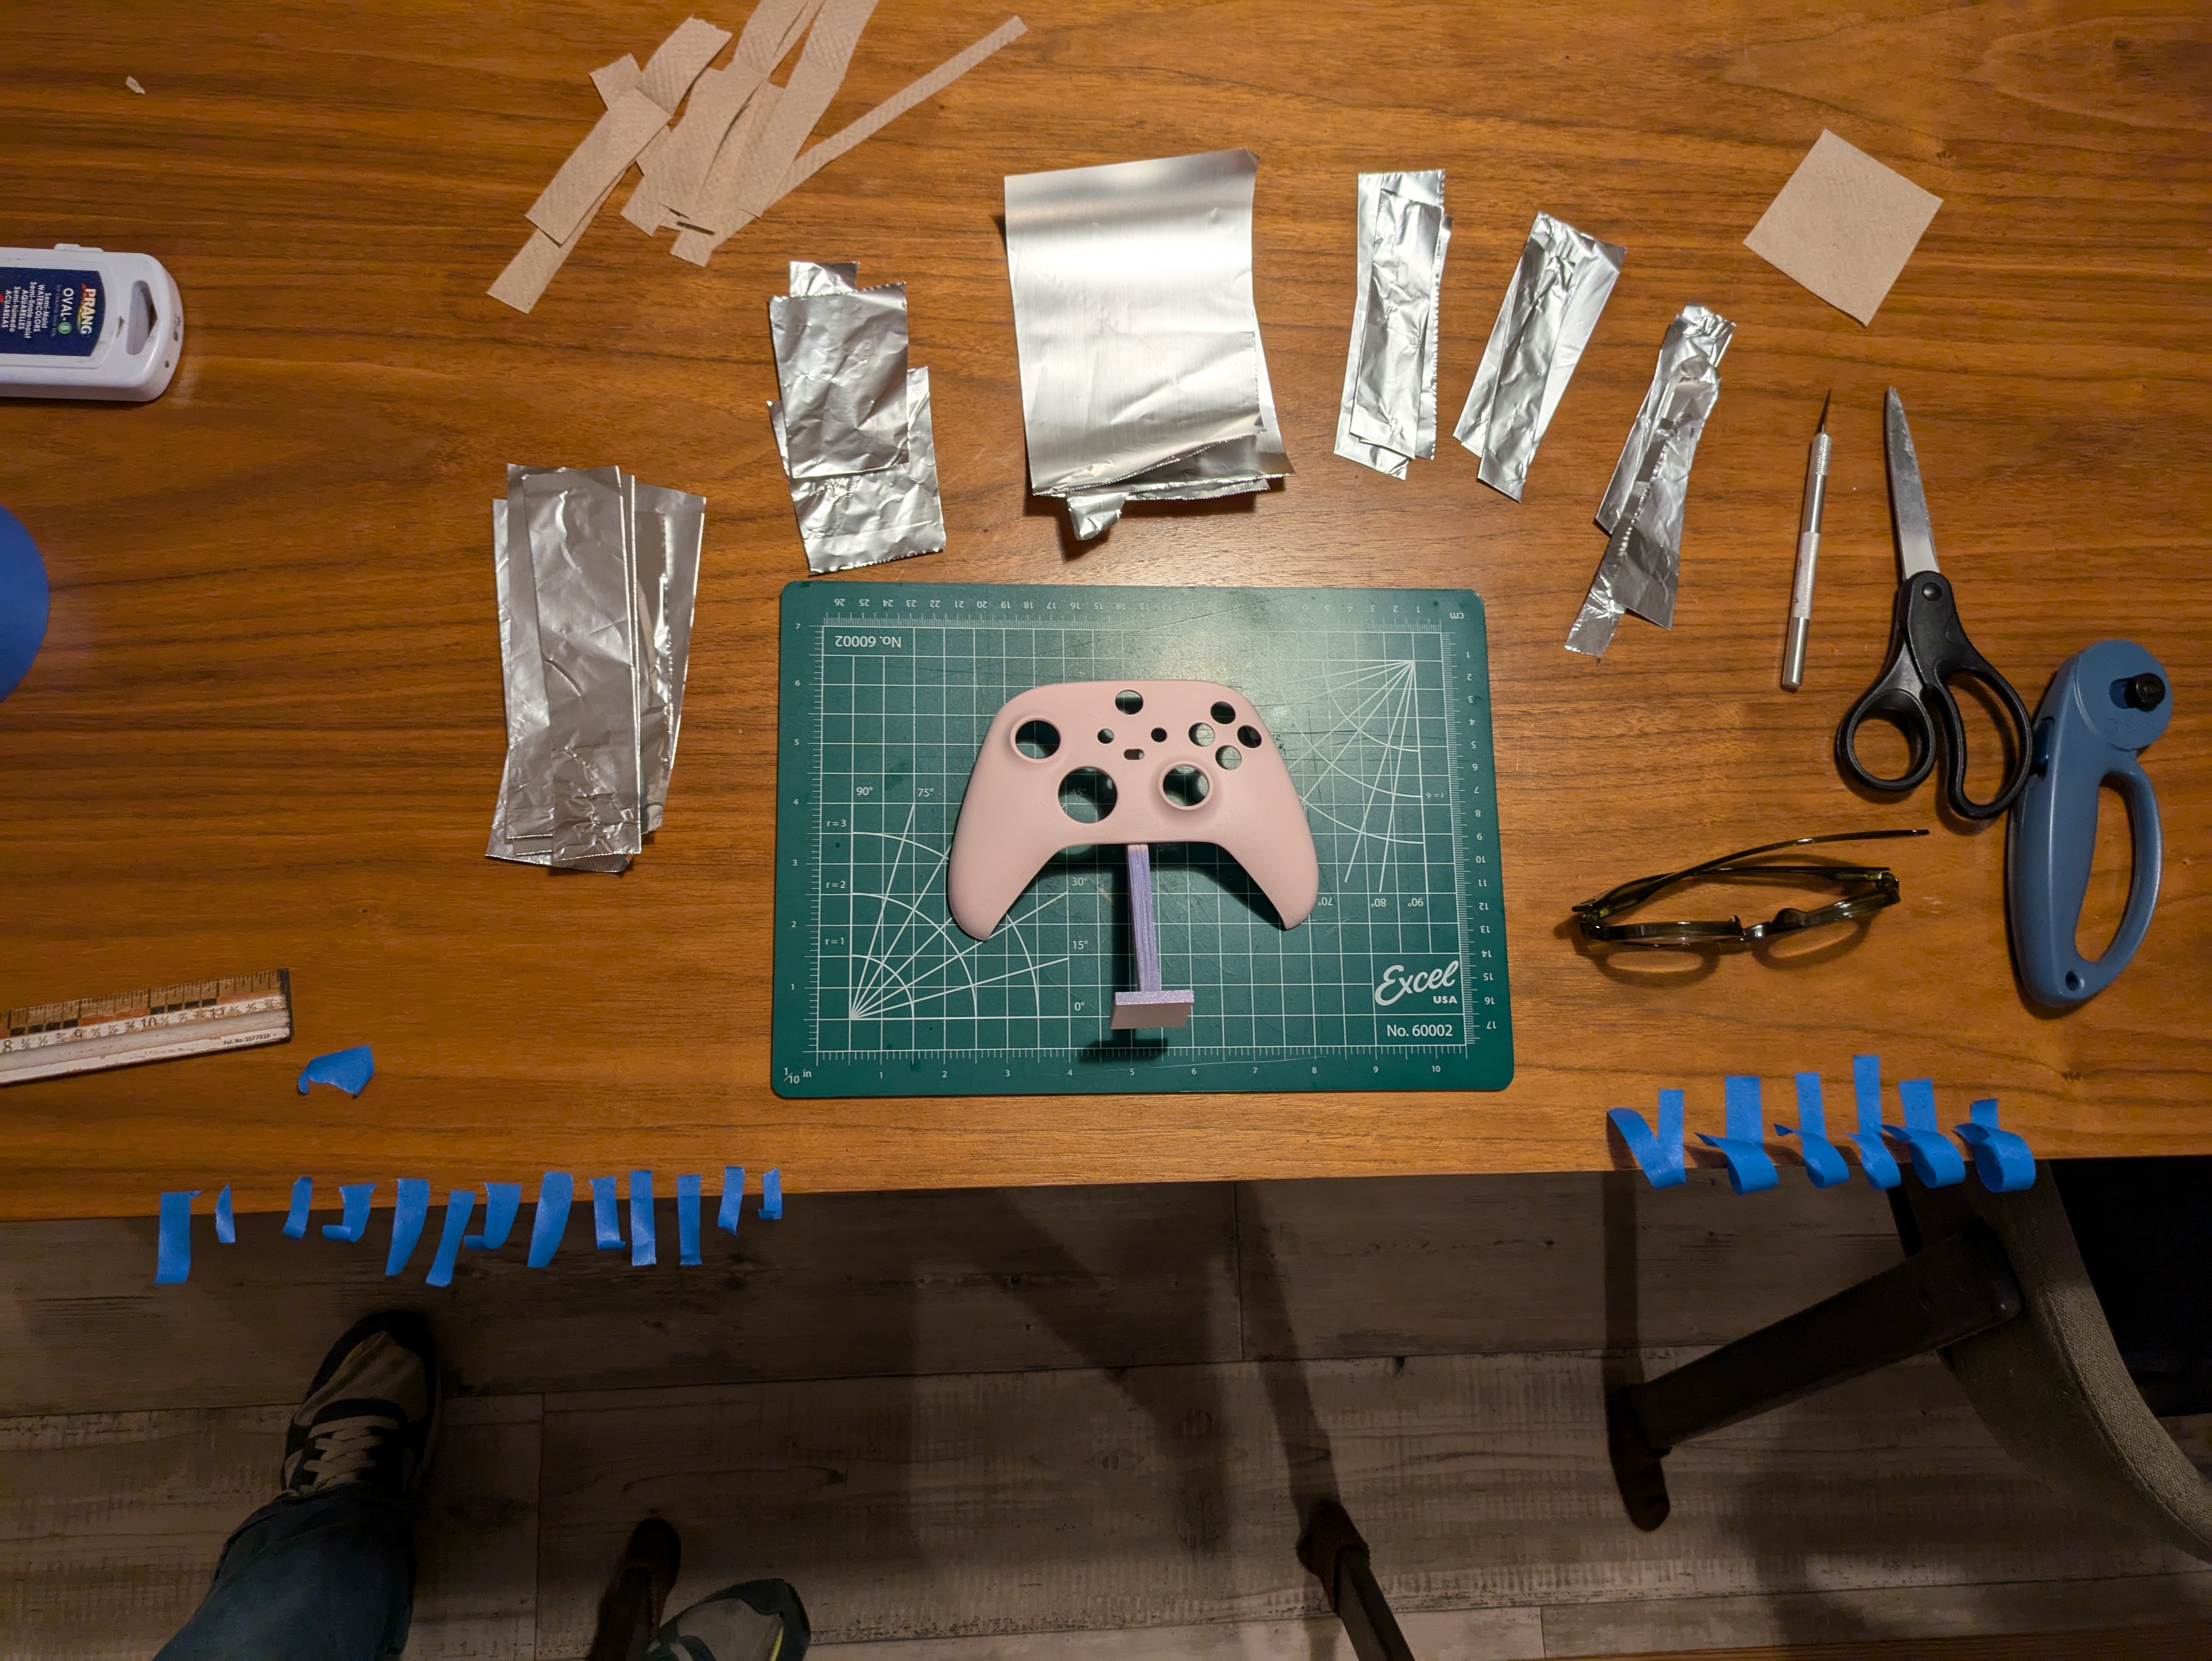
To make sure the paint wouldn't bleed beyond the edges of the stencils, I tested it on a separate controller first. I was worried about putting any adhesives on the painted controller (especially after the last disaster), so I covered the whole surface without directly taping to the face. I used paper towels in this test, and only taped them to the back of the controller, to the stencils, and to each other. The only adhesive touching the controller was the light tack spray adhesive.
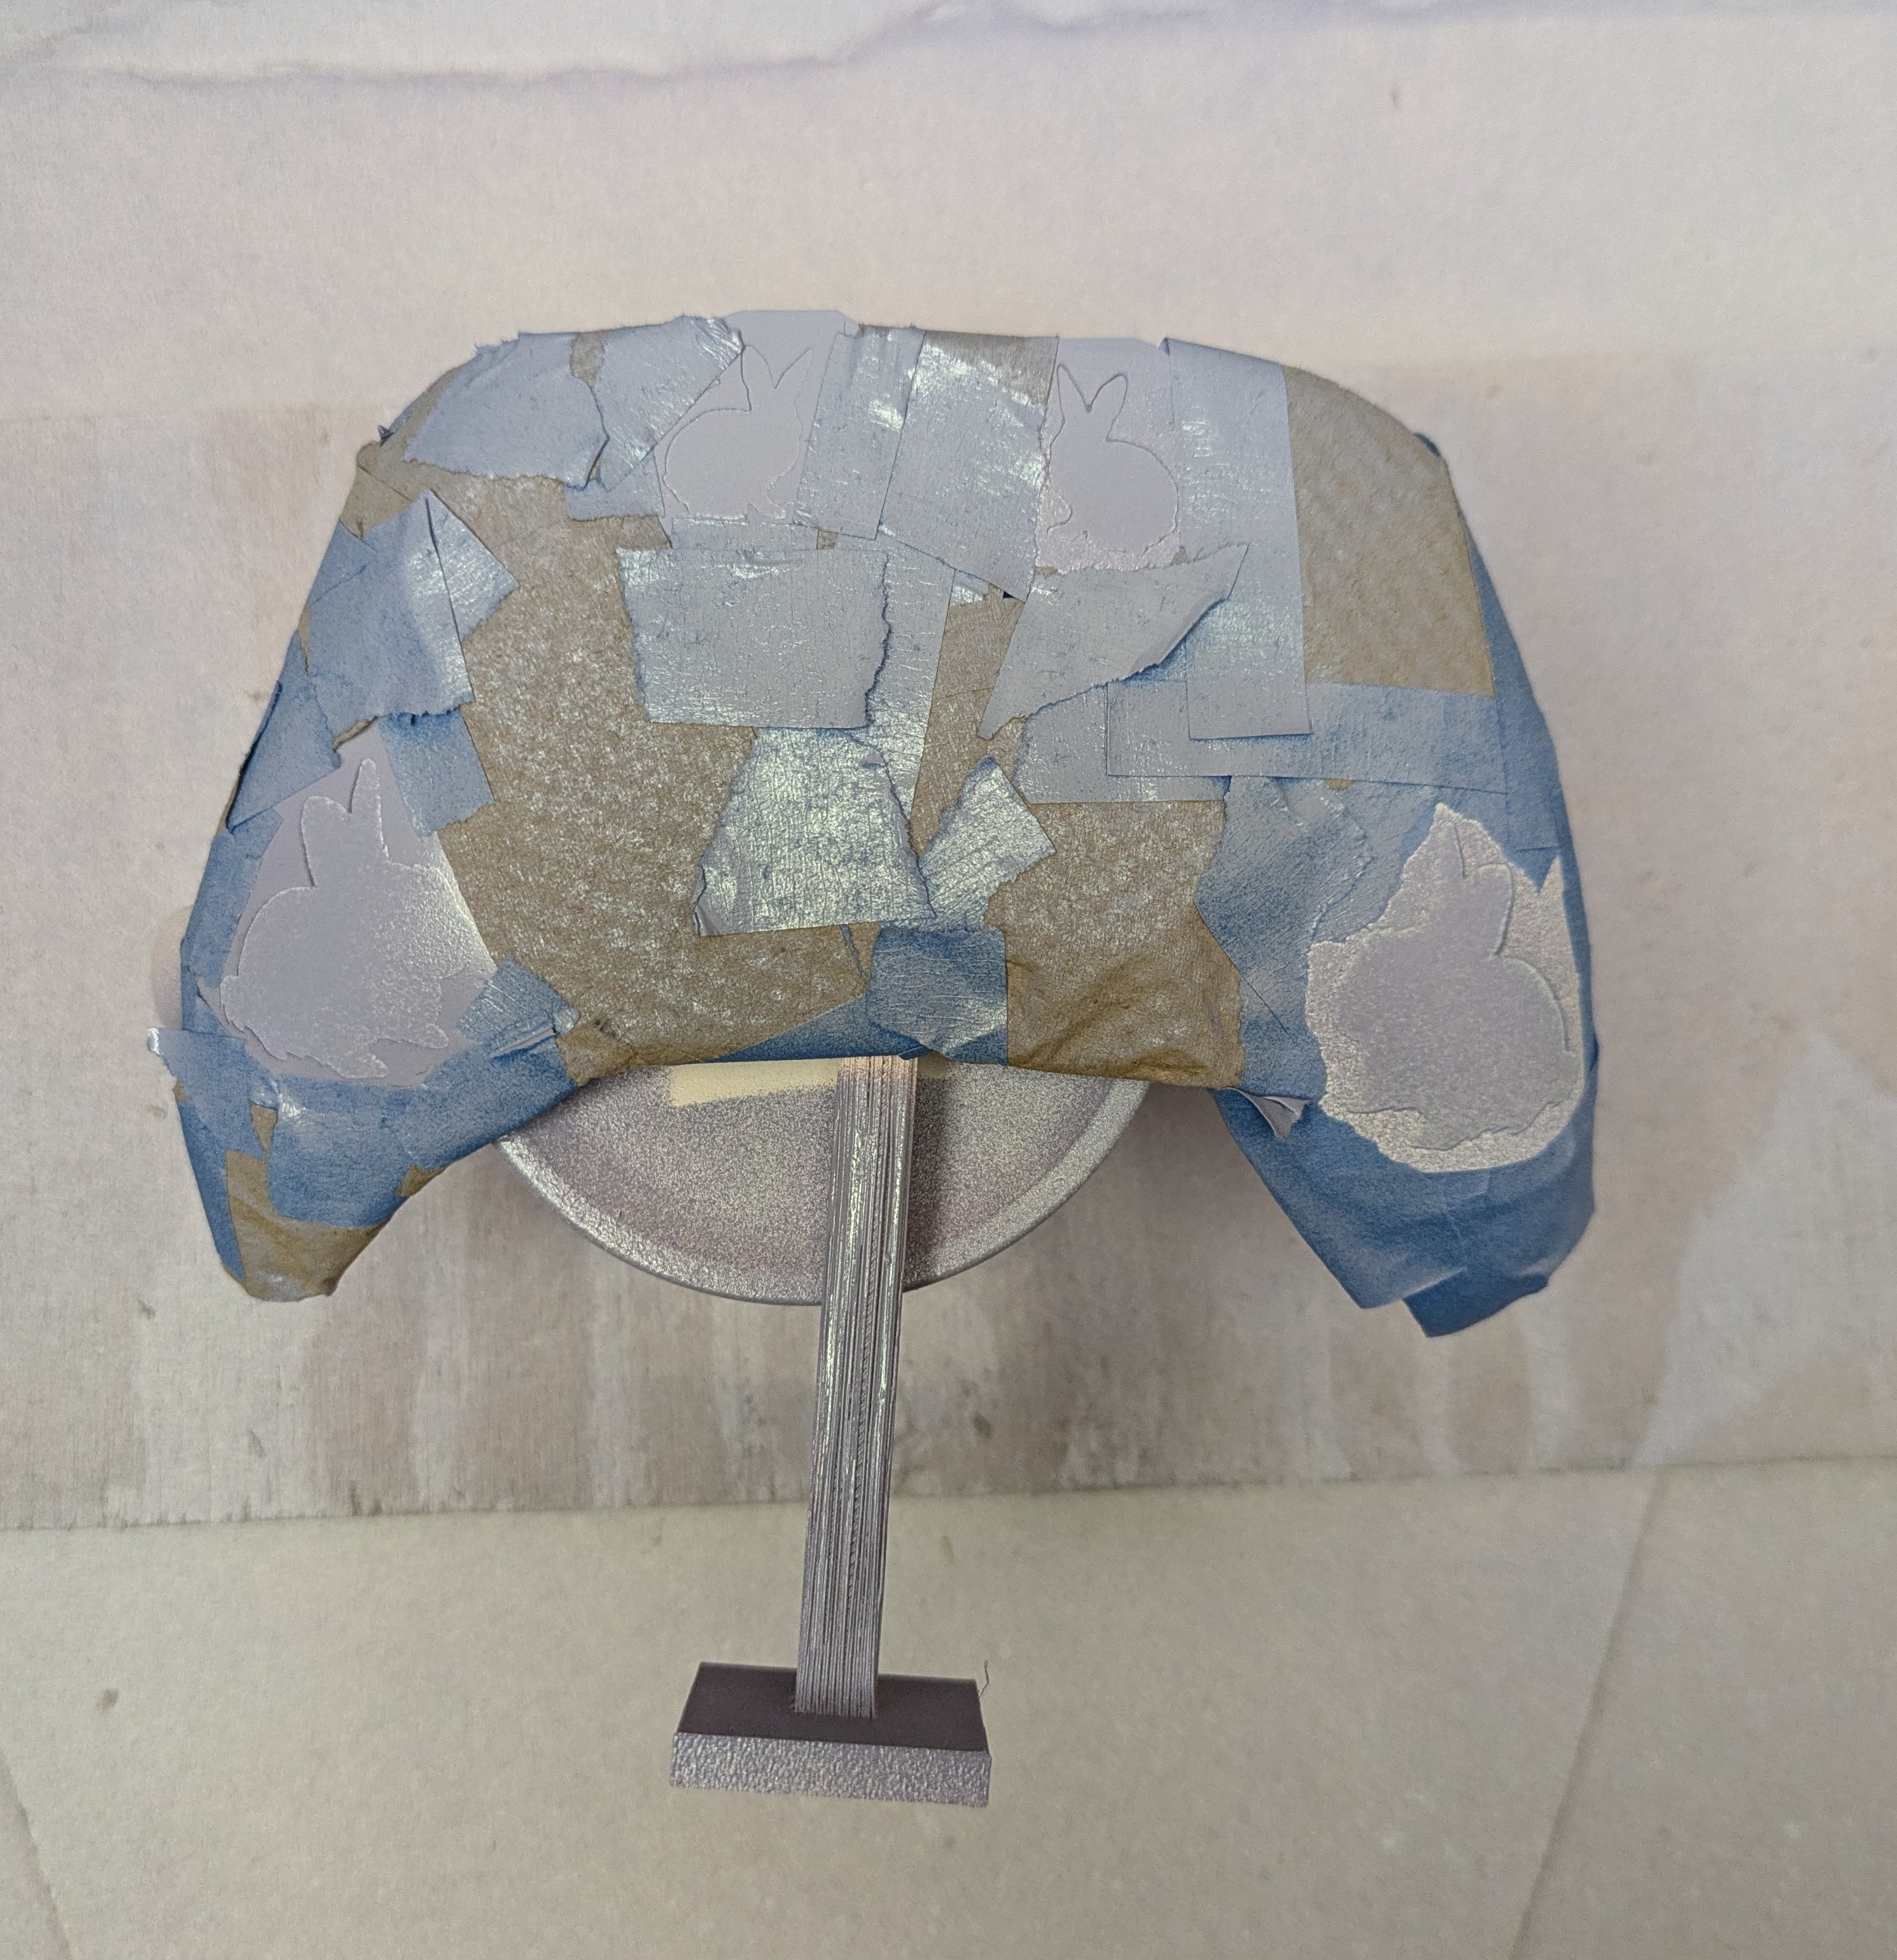
My test controller, with the masking applied and painted
It worked!
I learned a couple of tricks, first of all the stencils on the curved surfaces would kink. I made a cut on the round back of the bunny, that way the stencil would overlap it's self instead of kinking up. Second, from other testing I learned to do a few very thin coats. Any running of the paint, even minor amounts will cause the paint to run under the stencil and cause a smeary mess. Third, the adhesive I chose seems to loosen over time. It's best if I get the job done relatively quick after applying the stencils
On to the real thing! This time I decided to go with tin foil instead of paper towels because it keeps its shape as you bend it. I had my workstation prepped so I could mask out the controller as quick as possible after applying the stencils.
And now to the painting! The stencils didn't stick quite as well as I would have hoped on the second run, but it turned out pretty good + it didn't pull any paint off this time :). A win was exactly what I needed because at this point it was the night before my partner's birthday. In order to prevent staining and paint from rubbing off, it still needed a few clear coats put on. Me and my mother put on the first coat together, then I left it with her overnight so she could put a few more coats the next morning (each coat had to be spaced out by a few hours for best results).
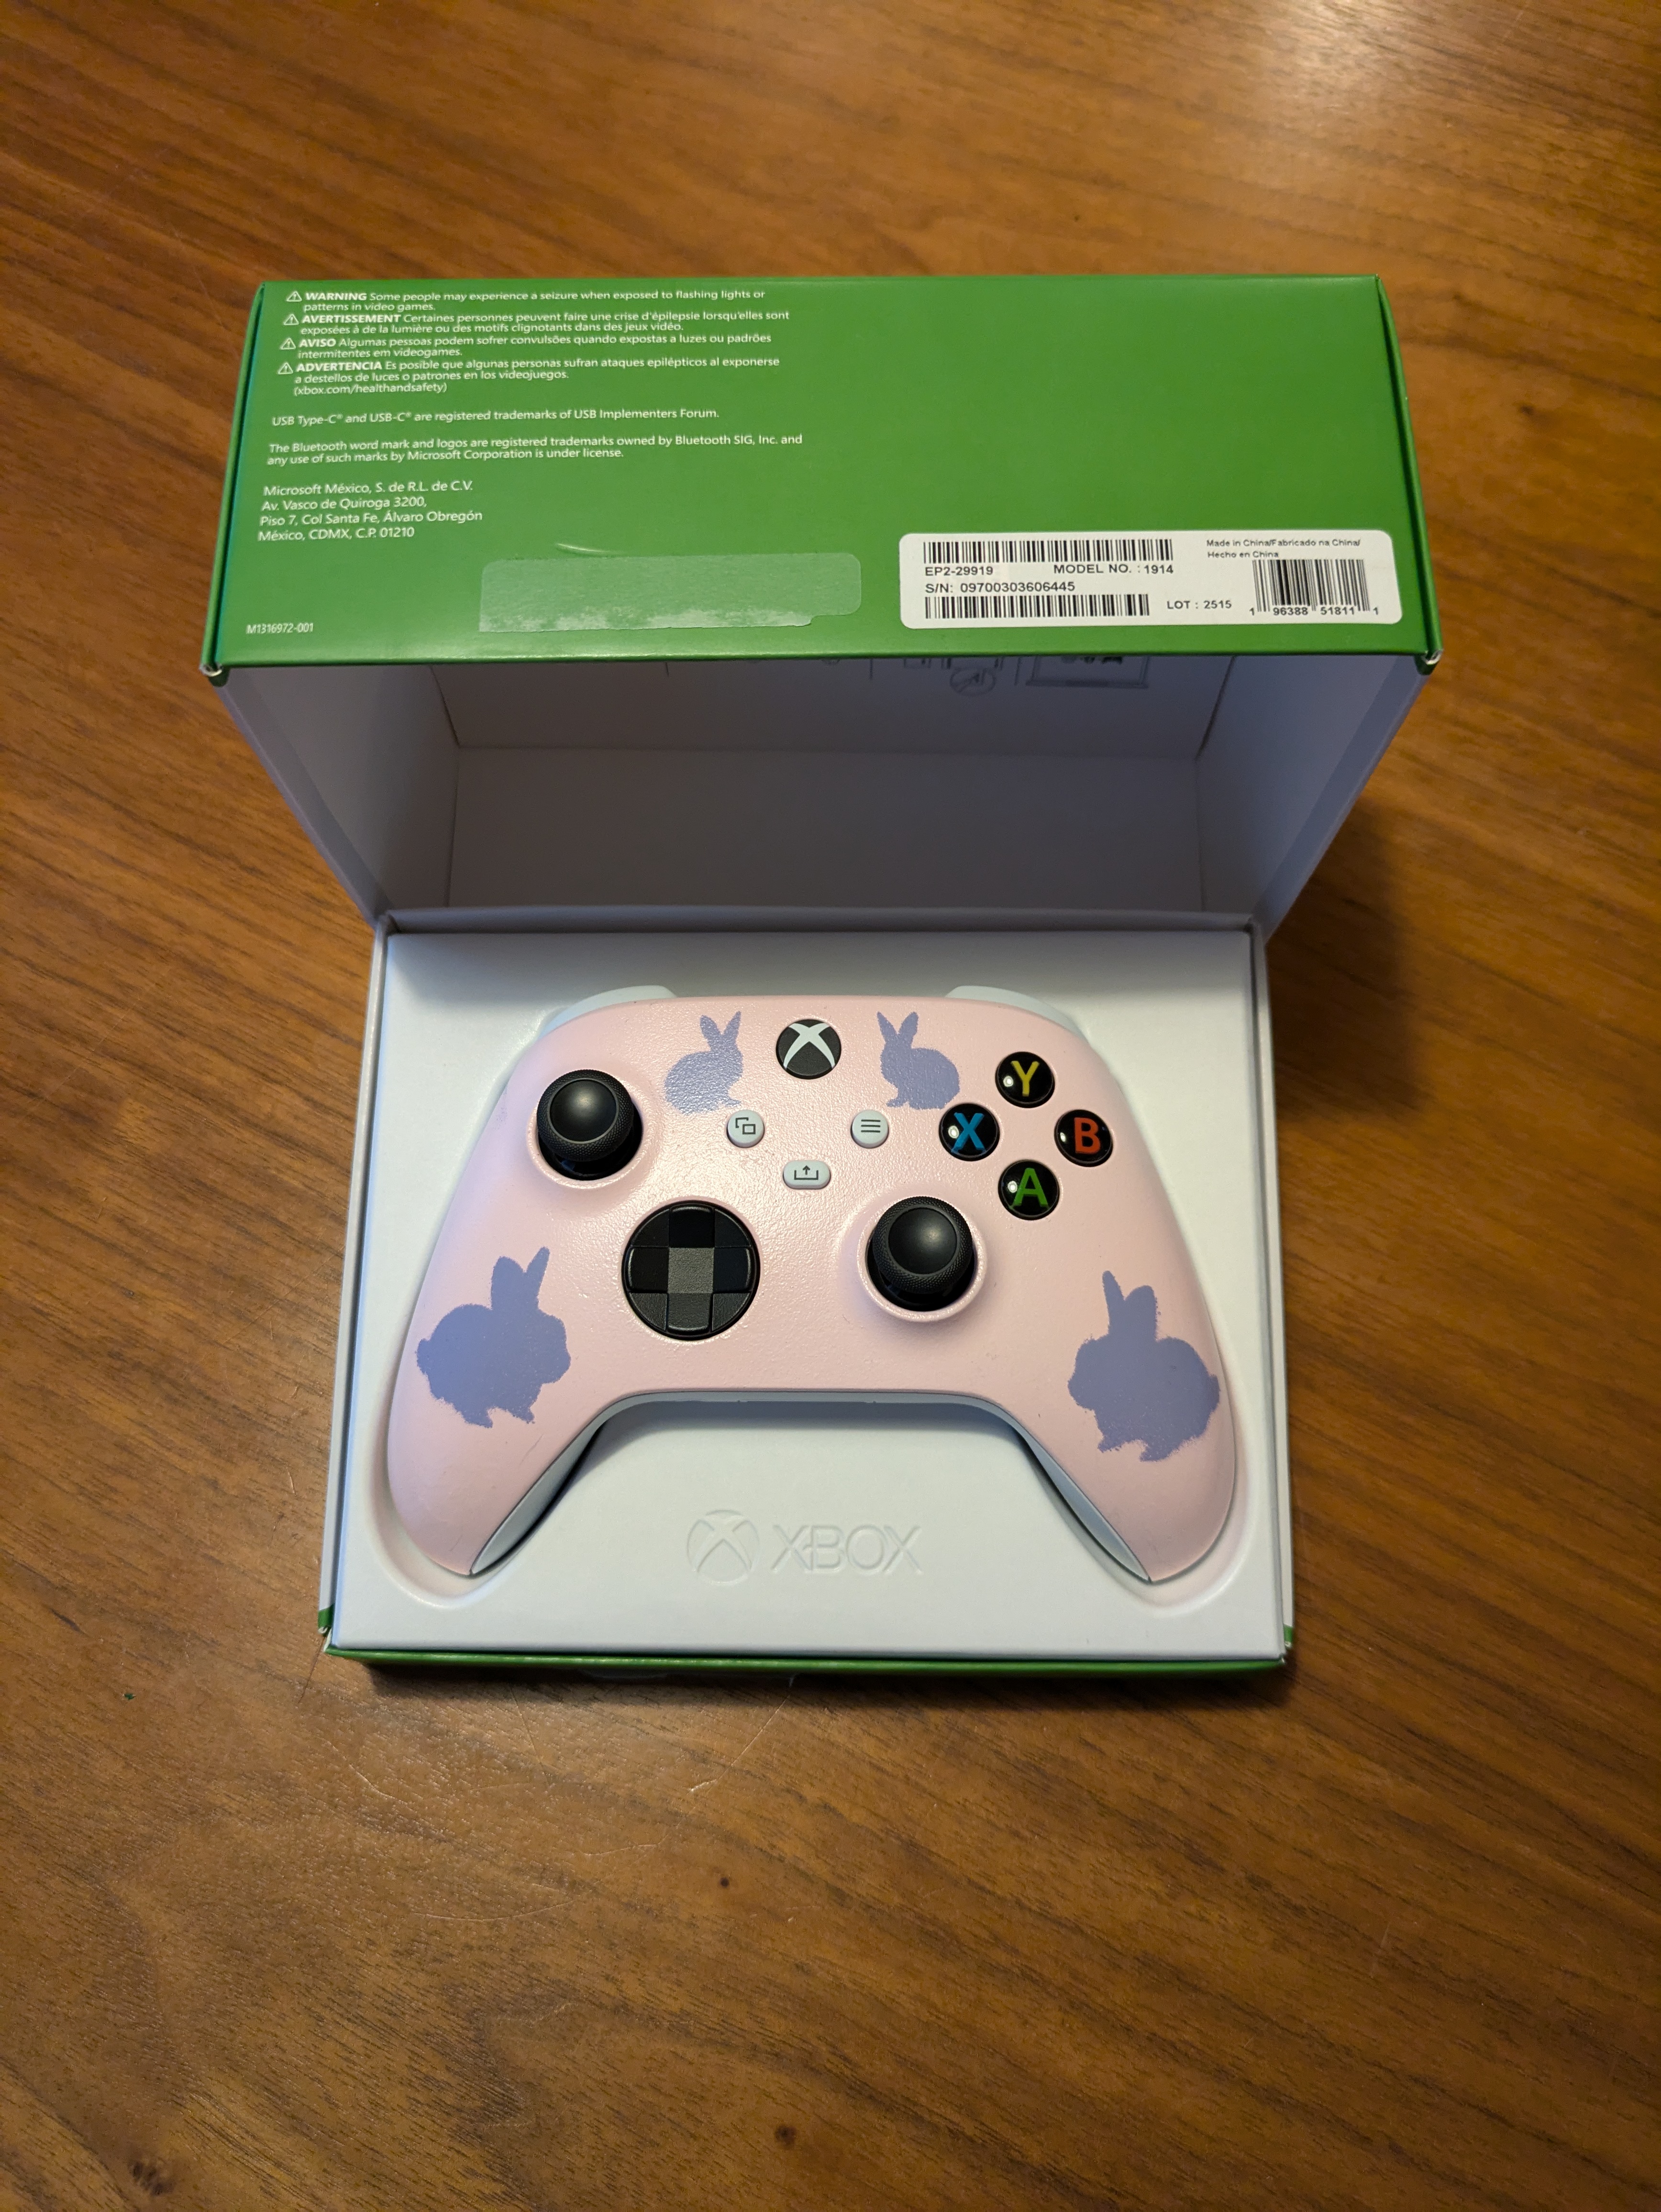
The final result!
The next day I picked it up from her. It turned out pretty good I think!
And I added a little teaser to the box, that way my partner would know I wasn't just giving them a plain white controller when they opened the gift.
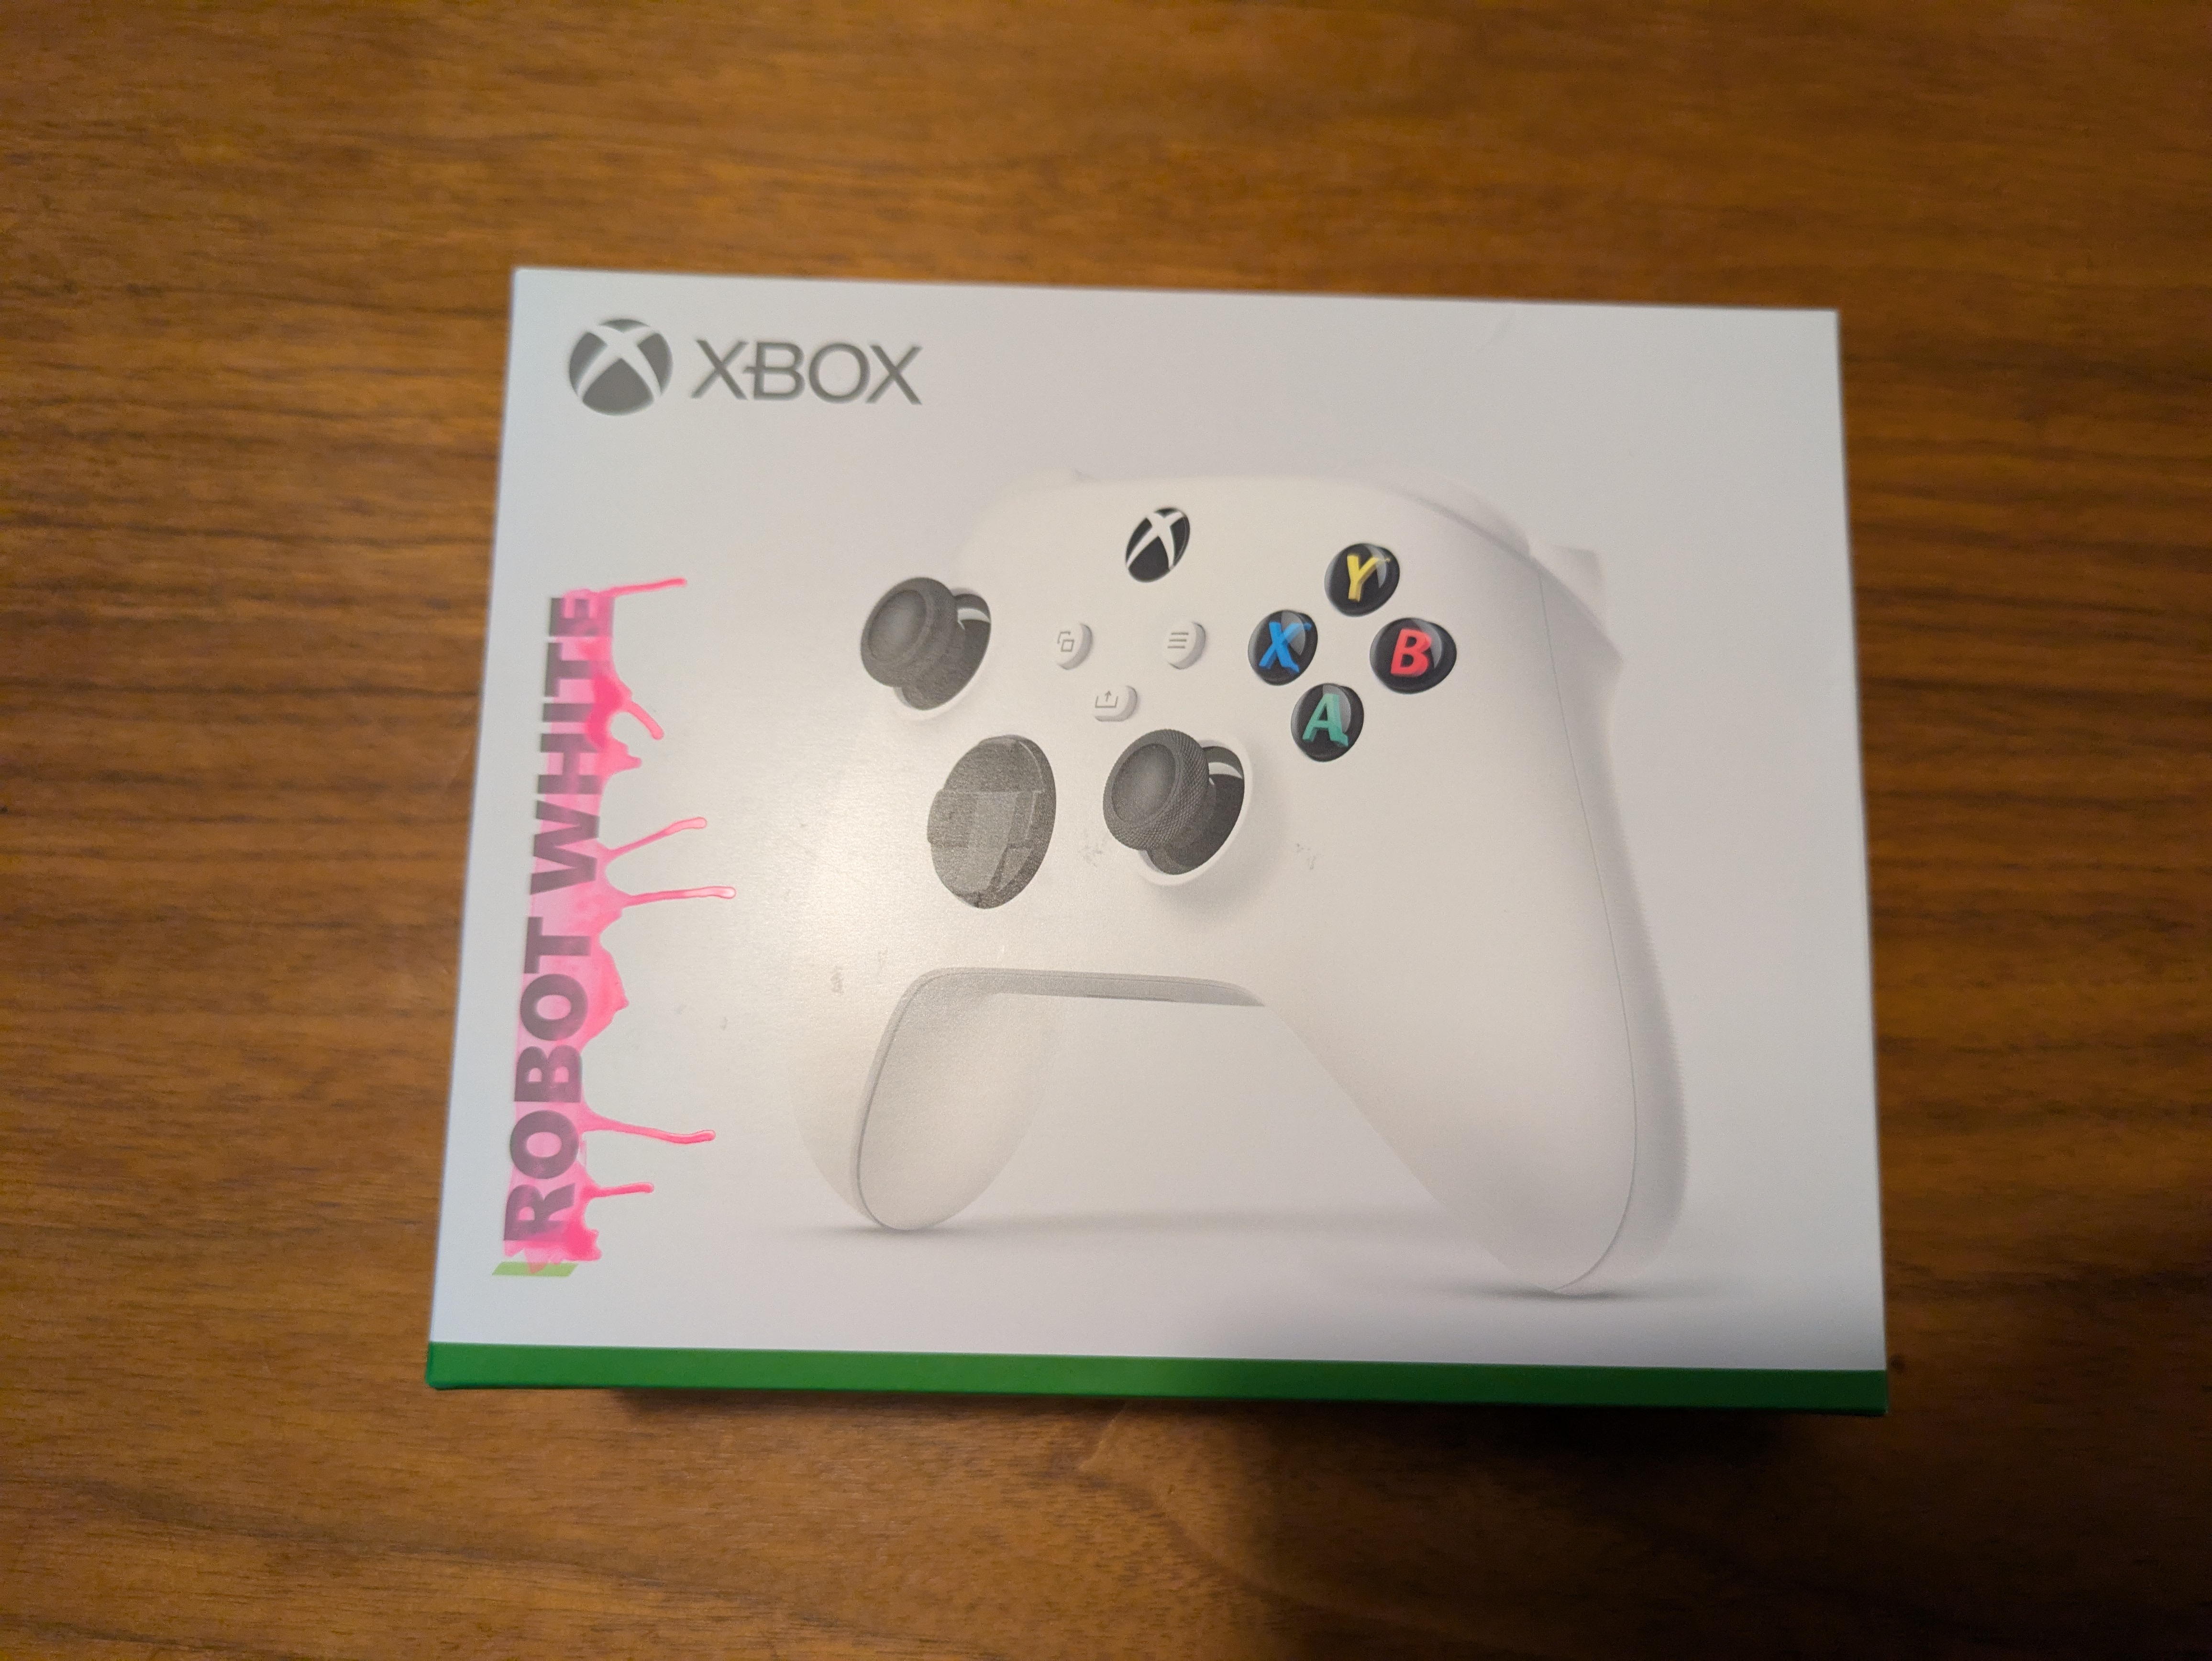
I used a paint marker, then blew on the paint in order to get the "dripping" sort of look
I'm pretty happy with how it turned out. Going into this I had zero experience painting and really thought this whole process would just take an afternoon. Well it ended up taking many hours over 5 days.. I hit so many pitfalls (and had so many mad rushes for additional materials that I didn't even mention in this post. things became very time sensitive towards the end). I'm glad that I did it though. Both because I think it's a cool gift, but also because next time I need to spray paint something I'll actually know what I'm doing.
It took me a while to get around to finishing this post, this all happened back last month. Like I mentioned in my last blog post, I'm taking some time off work to try and improve my life/mental health right now. One of my goals is to update this website more often, which I haven't been keeping up with very well. But I'm going to keep pushing at it!